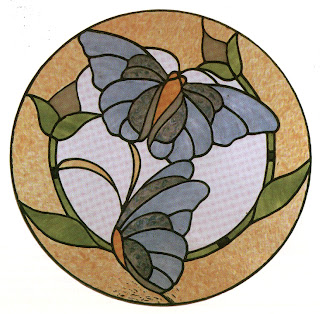
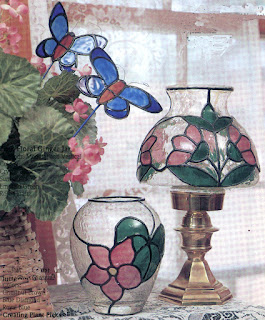
In the distant past, I was lucky enough to enjoy stained glass--both leaded and painted--not only as my vocation, but also as my avocation. A lot of my non-office time was spent making finished samples for seminars and displays, experimenting with new texturing effects, and testing new products. It's no wonder, then, that after awhile I ran out of windows and flat panels. At that point, I started combing the stores for other glass objects to embellish with my product.
The very first shopping spree produced three huge bags of three-dimensional and household items. This convinced me that Gallery Glass wasn't just for windows and framed art. As a lifetime glass crafter, I could now simulate many of the wonderful leaded glass decorator pieces in the boutiques and gift shops costing five or six times as much.
As usual, there were some technical challenges to overcome, but it was a task I accepted with relish. The results are in this post for you to see. Three alternative methods are presented:
Vertical - You can create an item that looks like stained glass directly on the item in an upright position
Horizontal - You can do it directly on the item which has been placed in a horizontal position
Modular - You can do part of the design on plastic (leading blank) and adhere it to the clean glass, then add straight strips and texture to complete the project.
Gallery Glass projects are fast and easy to create and are much less expensive than real leaded glass. Don't be satisfied to just duplicate what I've done, but learn the simple techniques and then use the patterns on your own glassware and accessories. Express your creativity and produce accessories for your home and make distinctive gifts that will amaze your friends. It's not only easy, it's fun! Dig through the cupboards and closets for clear items to decorate and let's get started.
The designs seen in this post can be adapted to many types of clear glass or plastic decorator items that you either already have around your house or can purchase inexpensively. Some suggestions are: canisters, jars, vases, picture frames, clocks, jewelry boxes, hurricane globes, lamps, candle holders, plates, and serving trays.
Before you begin your project--Select the Technique
The basic Window Color Technique involves two basic steps OUTLINE and PAINT. After the leaded outline is positioned, the textured paint will seal it indefinitely. There are three ways to accomplish these steps on three dimensional objects. You will want to choose the one that is easiest for your project. Choose the method that is used on a project that is most similar to yours.
Vertical Method: This method is best for multi-sided projects (such as canisters and geometric all-over designs. After the pre-cured leading strips are positioned onto the design, the textured paint is normally applied with the item in an upright position.

Horizontal Method: This method is best for large items and one-side embellishments (such as frames). Place the item in a flat, horizontal position, lead the design, let leading dry, and paint the project horizontally.
The Modular Method: This method is best for smaller items with intricate designs or motifs that require removeability, such as an item you may want to submerge in water (in which case the design must be removed first). Using this method, you will lead and paint your design onto a piece of plastic stencil blank material, then when paint is dry,you can peel the design up and place it onto your glass item. It is usually combined with the vertical method if an all-over design is desired. This short cut enables you to decorate a complicated pattern in a fraction of the time because the intricate leading and coloring are done quick and efficiently--horizontally.

 Redi-Lead is an option for this technique, however it is much more expensive than this method. If you are a good lead-er, you may wish to save money by making your own strips. They are much more natural looking, though extra time is required for them to dry. I use the leading blanks, but you may choose to use the alternative, which is cardboard covered with plastic. Estimate the number of feet of leading you will need by measuring the lines of your pattern. Two ounces of leading equals 31 linear feet. Follow general leading instructions for making the beads of leading. Adjust the size of the hole to fit the scale of your design. Larger designs look better with thicker strips. Outlining: Use a razor blade, craft knife, or scissors to trim any blotches or irregularities from the leading strips before applying them. Prepare item and place pattern under glass or transfer it to the surface with graphite paper. Peel up the cured leading strips and press them onto the clean glass, covering the pattern lines. Do not stretch the strips as you apply them. Strips can be pieced together by putting them together end to end, if you have a pattern line longer than your strip. Do not handle the strips any more than necessary. Small gaps will be filled in later. Intersecting lines should be trimmed with a single edge razor blade so that they meet cleanly; do not overlap leading strips. Spot leading: Touch up any gaps with Liquid Leading from the bottle. Let these spots dry thoroughly before applying the Gallery Glass paint. Applying Color To Your Project: Choose your colors carefully. The color scheme should compliment the decor in which it will be used. Clear or light value transparent colors are usually more pleasing in large areas such as backgrounds. Crystal Clear is always a safe color choice. The best designs have a variety of colors and textures--smooth, bumpy, opaque, transparent. Never shake the paint, it will make it too Thin. Practice on a piece of glass such as an old picture frame. Apply a block of all the colors to be used, and comb them with a toothpick. This will give you a preview of your color scheme. If you plan to use Crystal Clear, apply a block in order to practice your uniform bumpy texture technique. The color intensity will vary according to the thickness of application. Thicker paint is deeper in color. Be sure to allow your test blocks to dry and evaluate them in various lighting. Make adjustments as needed in your color scheme.
Coverage: The amount of paint you will need depends on the size and type of project, also on the thickness of application. For vertical application, allow one bottle for one square foot when applying paint from the bottle. Brushed-on coatings will cover more area. Measure your pattern and estimate the number of square inches there will be of each color. buy enough paint to complete the job. Having enough paint is especially important if mixing colors.


I got this book!!!! really enjoy going thru the older books and seeing projects that are really interesting and unique!!!!
ReplyDeleteYou are great! Wonderful compilation. I can go through the list and study them for better understanding.
ReplyDeletepanele szklane do kuchni wrocław